You may be asked to provide this information when requesting an Admin Tools for Portal buildArcGIS build if you are not using IWA.
To Create an App ID:
Step 1. Navigate to your out of the box
...
ArcGIS Enterprise interface from Esri.
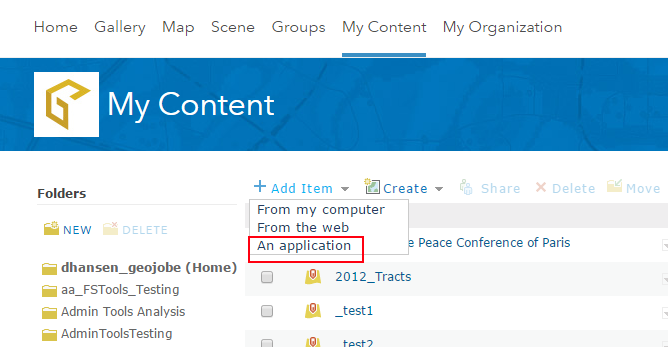
Step 2. Click "My Content" at the top of the screen.
Step 3. Click "Add Item" on the "My Content" Page
Step 4. Select "An Application" from the drop down.
Step 5. Fill in the form provided using the example screenshot below and your specific location of your Admin Tools for
...
ArcGIS Install on your web server.
Note: it is okay to create an empty directory on your web server at this point so you can provide a URL for the form. The directory can be populated once GEO Jobe has sent you an Admin Tools for
...
ArcGIS build to put in the directory.

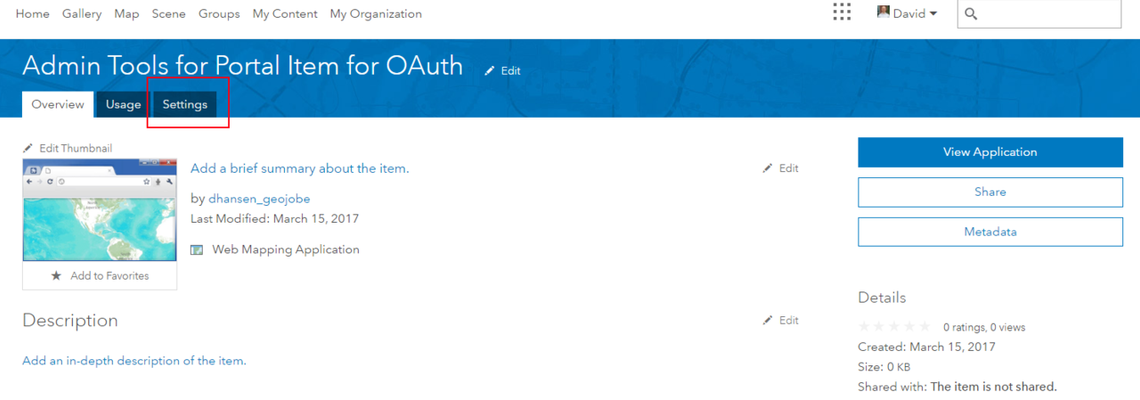
Step 6. Now that the item has been created, navigate to the "Settings" tab on the new item's "Item Details" page.
Step 7. Scroll to the bottom of the Settings page where the "App Registration" header is located and click the "Register" button.
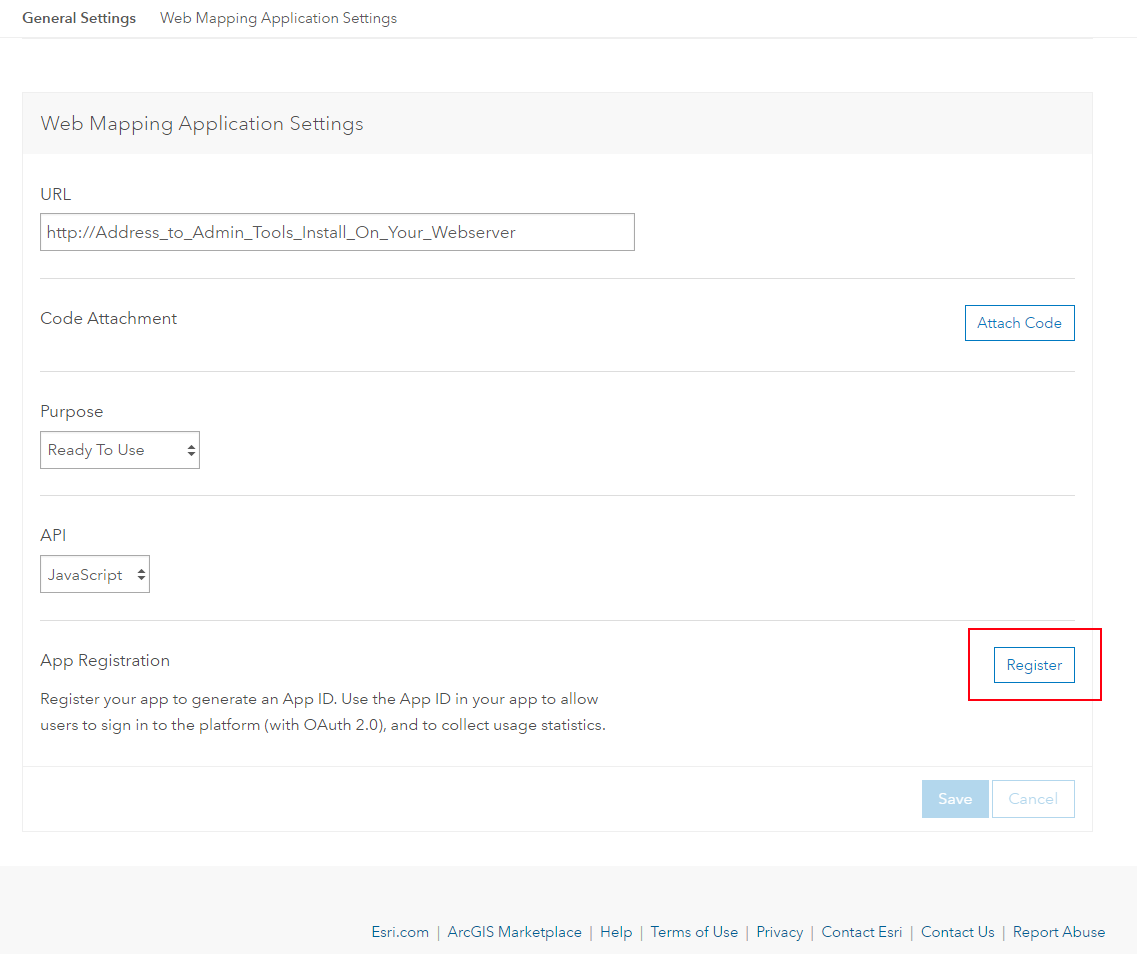
Step 8. Add the directory on your web server for the planned install of Admin Tools for
...
ArcGIS (we recommend adding both an http and https path) and then click Register.

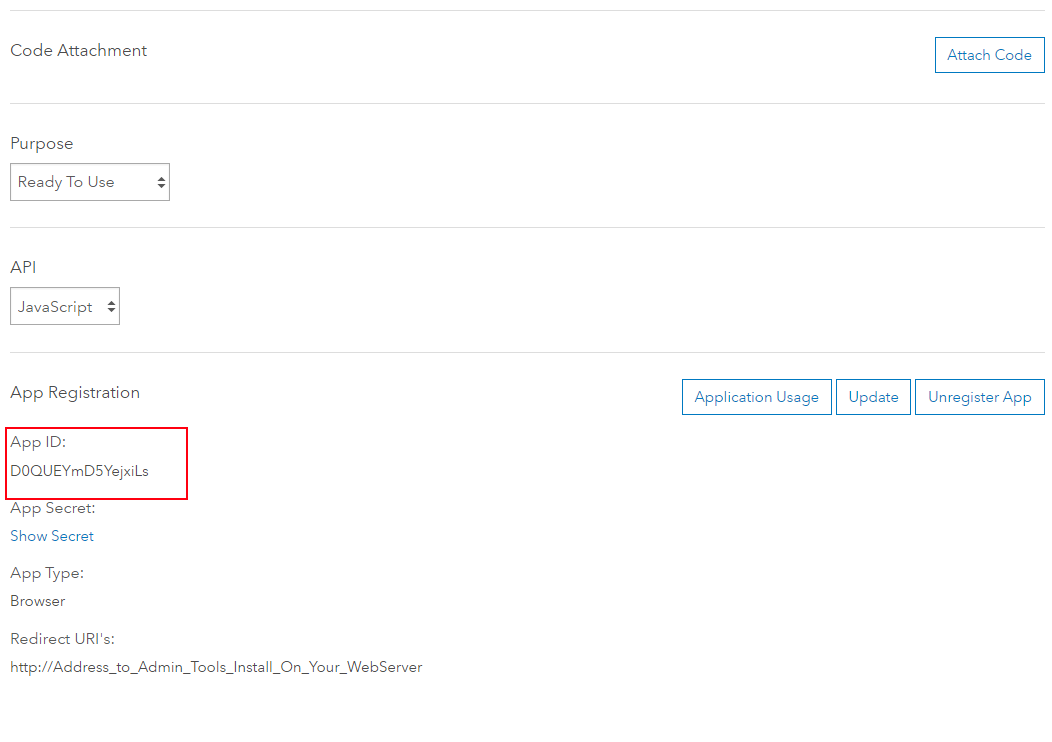
Step 9. Now that this process is complete, the App Registration section of the setting page should show an App ID that can be provided to GEO Jobe to complete your build process. Please copy and provide this app ID to GEO Jobe, so we can know that we have precisely the correct information to prepare your build.
Related articles
| Filter by label (Content by label) | ||||||||||||||||||
|---|---|---|---|---|---|---|---|---|---|---|---|---|---|---|---|---|---|---|
|
...