There will be times when you will need to update your Admin Tools version with a newer one. After requesting and being provided with a new build from GEO Jobe, please perform the following steps.
NOTE: This is the minimum steps required for a typical Admin Tools setup with no variables, security or other complications to overcome. It is not meant to serve as a comprehensive solution to any and all installation workflows and environments.
Step-by-step guide
- Stop the Admin Tools Server service in your windows services.
- Make sure to back up the old AdminTools folder (typically found in your wwwroot directory) before replacing the files (NOTE: We suggest COPYING the existing AdminTools folder to a new location, instead of renaming it, just in case you have custom files in your previous install that do not come standard with your build).
- Extract and replace all the files from the zip file that GEO Jobe has provided you into your existing AdminTools Folder (not the backup).
- Go into IIS, and ensure that the AdminTools folder is still converted to an application.
- Start that service again after the files are copied.
- You should now be running the new version. You can verify this by checking the bottom right corner of the Admin Tools page once you have logged into the tools.
Updating Only
This is for the Update/Replacement of a newer version of Admin Tools. If this is your first installation of the tools, please see the following article:
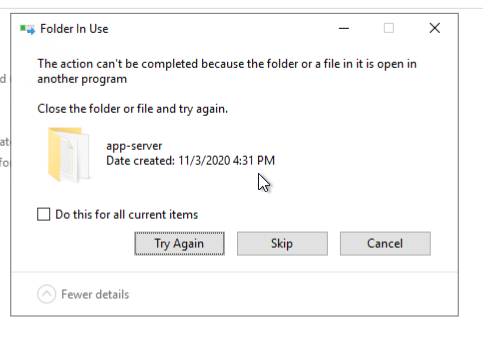
If You Get A "Folder In Use" Error When Overwriting The app-server Folder:
In some instances, nssm.exe may still be holding open the files in the app-server directory.
Finding and stopping the process should allow the files could then be overwritten.
Related articles